Surviving in the Wild: Essential Tips for Adventure Seekers

Are you an adventure seeker looking to test your survival skills in the wilderness? Whether you are planning a solo trek through the forest or embarking on a camping trip with friends, knowing how to survive in the wild is crucial. From finding shelter to sourcing food and water, here are some essential tips to help you navigate the great outdoors and come out unscathed.
Finding Shelter
In a survival situation, finding shelter should be your top priority. Shelter not only protects you from the elements but also helps regulate body temperature and conserve energy. Look for natural shelters such as caves, overhangs, or fallen trees. If these options are not available, build a shelter using branches, leaves, and other natural materials. A sturdy shelter will keep you safe and dry, giving you a much-needed respite from the harsh wilderness.
Sourcing Food and Water
Food and water are essential for survival, but they can be scarce in the wild. Knowing how to forage for edible plants and identify safe water sources is crucial. Look for wild edible foods such as berries, nuts, and roots. Avoid mushrooms unless you are an experienced forager, as many wild mushrooms are poisonous. When it comes to water, always purify it before drinking to avoid waterborne illnesses. Boiling, filtering, or using water purification tablets are effective methods to make water safe for consumption.
Navigating the Terrain
Navigating the wilderness can be challenging, especially if you are unfamiliar with the terrain. Carry a map and compass or a GPS device to help you find your way. Pay attention to landmarks such as rivers, mountains, or rock formations that can guide you back to safety. If you get lost, stay calm and conserve your energy. Building a signal fire or creating visual signals with rocks or branches can help rescuers locate you.
Staying Safe from Wildlife
Encountering wildlife is a common occurrence in the wild, but knowing how to avoid or handle such encounters is essential. Be aware of your surroundings and make noise while hiking to alert animals of your presence. If you encounter a bear or other predatory animal, do not run. Instead, make yourself look bigger by raising your arms and speaking loudly. Carry bear spray or a whistle for added protection.
Conclusion
Surviving in the wild requires a combination of knowledge, skills, and preparedness. By familiarizing yourself with essential survival techniques and practicing them before your adventure, you can increase your chances of staying safe and making it back home in one piece. Remember to always respect nature and leave no trace of your presence to preserve the wilderness for future generations. Stay safe, stay prepared, and enjoy the thrill of exploring the great outdoors.
The Value of Baseboard Vents for Our Homes – Home Survival

In our pursuit of the perfect home environment, we often pour over color swatches, furniture designs, and lighting, yet frequently overlook the quiet workhorses that are baseboard vents. Imagine a symphony where the ornate fixtures and grand stage play lead, but it’s the unassuming but crucial footlights that truly illuminate the scene. That is the baseboard vent, an essential element that often goes unnoticed despite its pivotal role in the maintenance of our living spaces.
For the uninitiated home-improvement enthusiast or the ex-military individual who appreciates the utility of the underappreciated, there’s much to discover about these unassuming fixtures. Here, we’ll explore the multifaceted benefits of baseboard vents and why they’re a critical – yet often missed – element in the grand orchestration of our daily comfort and survival.
Efficient Heat Distribution
Baseboard vents are the unsung warriors of heat distribution. Unlike traditional radiators, baseboard vents allow hot air to rise naturally, reducing cold spots in the room and maintaining a consistent and comfortable temperature. They work with the convection current to keep rooms warm without the need for noisy fans or the dust accumulation common with floor-level registers. This natural heat flow is like a smooth salsa dancer navigating the floor – elegant, seamless, and effortlessly covering every corner.
Enhanced Air Circulation
A stagnant room is the enemy of comfort and health. In this arena, baseboard vents reign supreme by enhancing air circulation. By their very design, they encourage a constant flow of warm air up and cool air down, which can prevent moisture buildup and the staling of indoor air. Picture it as the gentle breeze you’d feel near a calm river – refreshing, invigorating, and a constant assurance that the environment is in a harmonious state.
Aesthetic Appeal
Function doesn’t have to be at odds with form. Baseboard vents, often sleek and low-profile, contribute to the visual appeal of a room. Their subtle presence doesn’t detract from the overall design, and in some cases, can even complement the architectural elements of a space. Like a well-tailored suit, baseboard vents can blend into the background, silently supporting and enhancing the overall look and feel of a room.
Customizable Settings
One size doesn’t fit all, especially in the realm of personal comfort. Baseboard vents often come with adjustable louvers that allow for personalized control over the air direction and flow. This level of customization ensures everyone in the household is content, allowing cooler settings for those who run hot and keeping the perpetually cold at ease – a testament to adaptability and personalization that many other heating systems can’t offer.
The value of baseboard vents extends beyond managing the physical climate of our homes. It’s about creating an ecosystem where warmth, health, and individual comfort coexist. For those seeking the best in home survival, like our military days, the humble baseboard vent should be a star player in their planning. It is both a testament to minimalistic design and a powerhouse of functionality. Next time you feel the gentle current of warm air from one, offer a nod of appreciation to this under-celebrated hero.
How to Skin an Elk: A Guide for Outdoor Enthusiasts
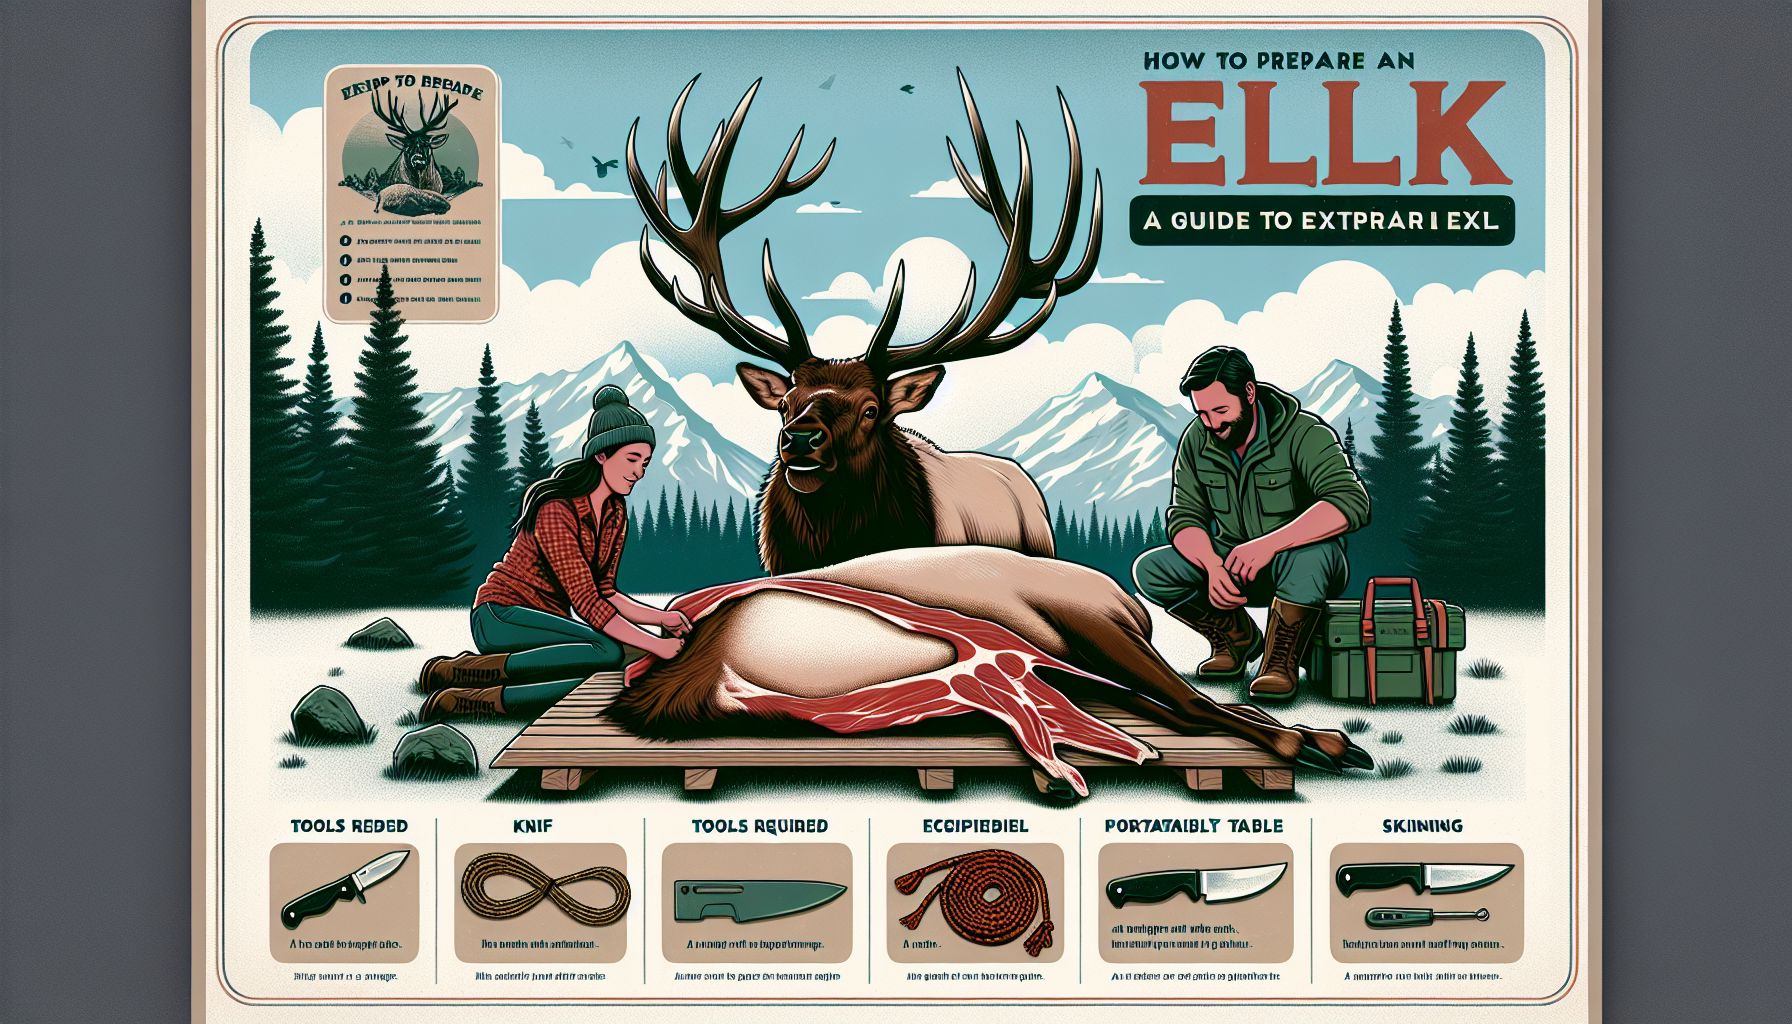
For outdoor enthusiasts, campers, and families who enjoy spending time in the wilderness, learning how to skin an elk can be a valuable skill to have. Not only does it provide you with a source of food, but it also allows you to fully embrace the thrill of the hunt and make the most of your outdoor experience. In this guide, we will walk you through the step-by-step process of skinning an elk, from start to finish.
Introduction
Before you begin the process of skinning an elk, it is important to ensure that you have all the necessary tools on hand. You will need a sharp hunting knife, a bone saw, and a sturdy pair of gloves to protect your hands. Additionally, having a clean workspace and plenty of space to work in is essential.
Body
-
Locate a suitable location: Once you have successfully harvested an elk, the first step in skinning it is to find a flat and level area to work in. This will make the process much easier and more efficient.
-
Secure the elk: Before you can begin skinning the elk, you will need to secure it in place. This can be done by tying its legs together or using a sturdy tree branch to hang it from.
-
Make the initial incision: Using your hunting knife, carefully make a small incision along the belly of the elk. Be sure to cut through the skin and fatty tissue, but avoid puncturing the internal organs.
-
Begin skinning the elk: Once you have made the initial incision, start peeling back the skin from the body of the elk. Use your knife to carefully separate the skin from the meat, working your way towards the legs and head.
-
Remove the skin: As you continue to peel back the skin, you will eventually be able to remove it completely from the elk’s body. Be sure to take your time and work carefully to avoid tearing the skin.
-
Process the meat: Once you have successfully skinned the elk, you can begin processing the meat. Use your bone saw to cut the elk into manageable pieces, which can be used for cooking or preserving.
Conclusion
Learning how to skin an elk is a valuable skill for outdoor enthusiasts, campers, and families who enjoy spending time in the wilderness. By following the steps outlined in this guide, you can make the most of your outdoor experience and fully embrace the thrill of the hunt. So next time you find yourself in the forest, remember to pack your hunting knife and gloves, and get ready to skin an elk like a pro.
In addition to the thrill of the hunt, skinned elk can provide a delicious source of food for you to enjoy. Whether you choose to cook the meat over an open fire or preserve it for later, the possibilities are endless. So why not add skinning an elk to your list of outdoor skills and make the most of your time in the great outdoors.
How to Hunt Turkey for Hikers

As outdoor enthusiasts who enjoy hiking and sourcing our food organically, hunting turkey can be a rewarding experience for hikers looking to elevate their outdoor skills and provide a sustainable source of protein. Turkey hunting requires skill, patience, and knowledge of the terrain and turkey behavior. In this guide, we will provide tips and techniques for hikers looking to hunt turkey in a professional and ethical manner.
Finding the Right Gear
Before setting out on a turkey hunt, it is important to ensure that you have the right gear. A reliable shotgun or bow, camouflage clothing, turkey calls, and decoys are essential tools for a successful hunt. Make sure to practice with your weapon of choice to ensure accuracy and familiarity. Additionally, a good pair of hiking boots and a backpack with water, snacks, and first aid supplies are essential for a safe and comfortable hunting trip.
Scout the Terrain
Like any successful hunt, scouting the terrain is crucial for locating turkey roosts, feeding areas, and travel routes. As a hiker, you likely have experience navigating rough terrain and reading maps. Use these skills to your advantage when scouting for turkey. Look for tracks, feathers, scratching patterns, and droppings to determine turkey activity in the area. Trails, creek beds, and open clearings are prime spots for setting up a blind or calling in turkeys.
Understanding Turkey Behavior
Turkeys are known for their keen eyesight and sharp hearing, making them a challenging game animal to hunt. Understanding turkey behavior is key to a successful hunt. Turkeys are most active in the early morning and late afternoon, so plan your hunt accordingly. Use turkey calls to mimic their vocalizations and attract them towards your position. Be patient and remain still, as turkeys can detect even the slightest movement.
Setting Up for Success
When setting up for a turkey hunt, choose a strategic location where you have clear visibility of the surrounding area. Set up your decoys in a naturalistic manner to draw turkeys closer. Use calls sparingly and listen for responses from nearby turkeys. Stay hidden and avoid making sudden movements that could alert the turkeys to your presence. When a turkey is in range, take your shot carefully and ethically to ensure a clean kill.
Ethical Considerations
Hunting is a privilege that comes with ethical responsibilities. As a hiker hunting for turkey, it is important to practice ethical hunting practices, such as taking only clean shots, respecting wildlife and their habitats, and following all regulations and laws. Be sure to obtain the necessary hunting permits and licenses before embarking on a turkey hunt. Remember that hunting is a way to connect with nature and provide food for yourself in a sustainable and respectful manner.
Conclusion
Hunting turkey as a hiker can be a challenging and rewarding experience that combines outdoor skills with sustainable food sourcing. By finding the right gear, scouting the terrain, understanding turkey behavior, and setting up for success, hikers can increase their chances of a successful hunt. Remember to always practice ethical hunting practices and respect wildlife and their habitats. As hikers who appreciate the outdoors and value organic food sources, hunting turkey can be a fulfilling way to connect with nature and provide for yourself in a responsible way. Happy hunting!
Building a Shelter in the Woods: A Guide for Adventure Seekers

Are you an adventure seeker looking to spend a night under the stars in the great outdoors? Building a shelter in the woods can be a rewarding and fulfilling experience, allowing you to connect with nature in a unique way. Whether you’re hiking through the wilderness or simply looking to escape the hustle and bustle of everyday life, constructing a shelter in the woods can provide a sense of peace and tranquility like no other. In this guide, we’ll walk you through the steps to building a basic shelter in the woods, perfect for your next adventure.
Choosing a Location
The first step in building a shelter in the woods is choosing a suitable location. Look for a flat and level area that is away from any potential hazards such as dead trees or cliffs. You’ll also want to consider the direction of the wind and position your shelter to provide protection from the elements. Additionally, try to find a spot near a water source for easy access to drinking water and for growing food organically if necessary.
Gathering Materials
Once you’ve found a suitable location, it’s time to gather materials for your shelter. Look for fallen branches, sticks, and leaves to use as building materials. You can also use a tarp or a poncho if you have one available. Be mindful of your surroundings and try to use materials that are readily available without causing harm to the environment.
Building the Shelter
Start by creating a frame for your shelter using long branches or sticks. Lean them against a tree or tie them together to create a sturdy structure. Once you have the frame in place, cover it with leaves, branches, and any other available materials to create a waterproof barrier. If you have a tarp or poncho, you can use it as a roof to provide additional protection from the elements.
Adding Finishing Touches
To make your shelter more comfortable, consider adding a layer of leaves or grass on the ground for insulation and padding. You can also create a makeshift bed using branches and leaves to elevate you off the ground. If you plan on staying for an extended period, think about setting up a small cooking area for preparing meals using a portable stove or open fire.
Growing Food Organically
For adventure seekers interested in sustainable living, consider growing food organically near your shelter. You can plant seeds for vegetables or herbs and tend to them during your stay in the woods. This will not only provide you with fresh and nutritious food but also help you connect with the land in a deeper way.
Conclusion
Building a shelter in the woods can be a transformative experience for adventure seekers looking to connect with nature. By choosing a suitable location, gathering materials, and following the steps outlined in this guide, you can create a comfortable and safe shelter for your next outdoor adventure. Remember to respect the environment and leave no trace behind as you explore the beauty of the great outdoors. Happy building!
How to Skin an Elk: A Guide for Outdoor Enthusiasts
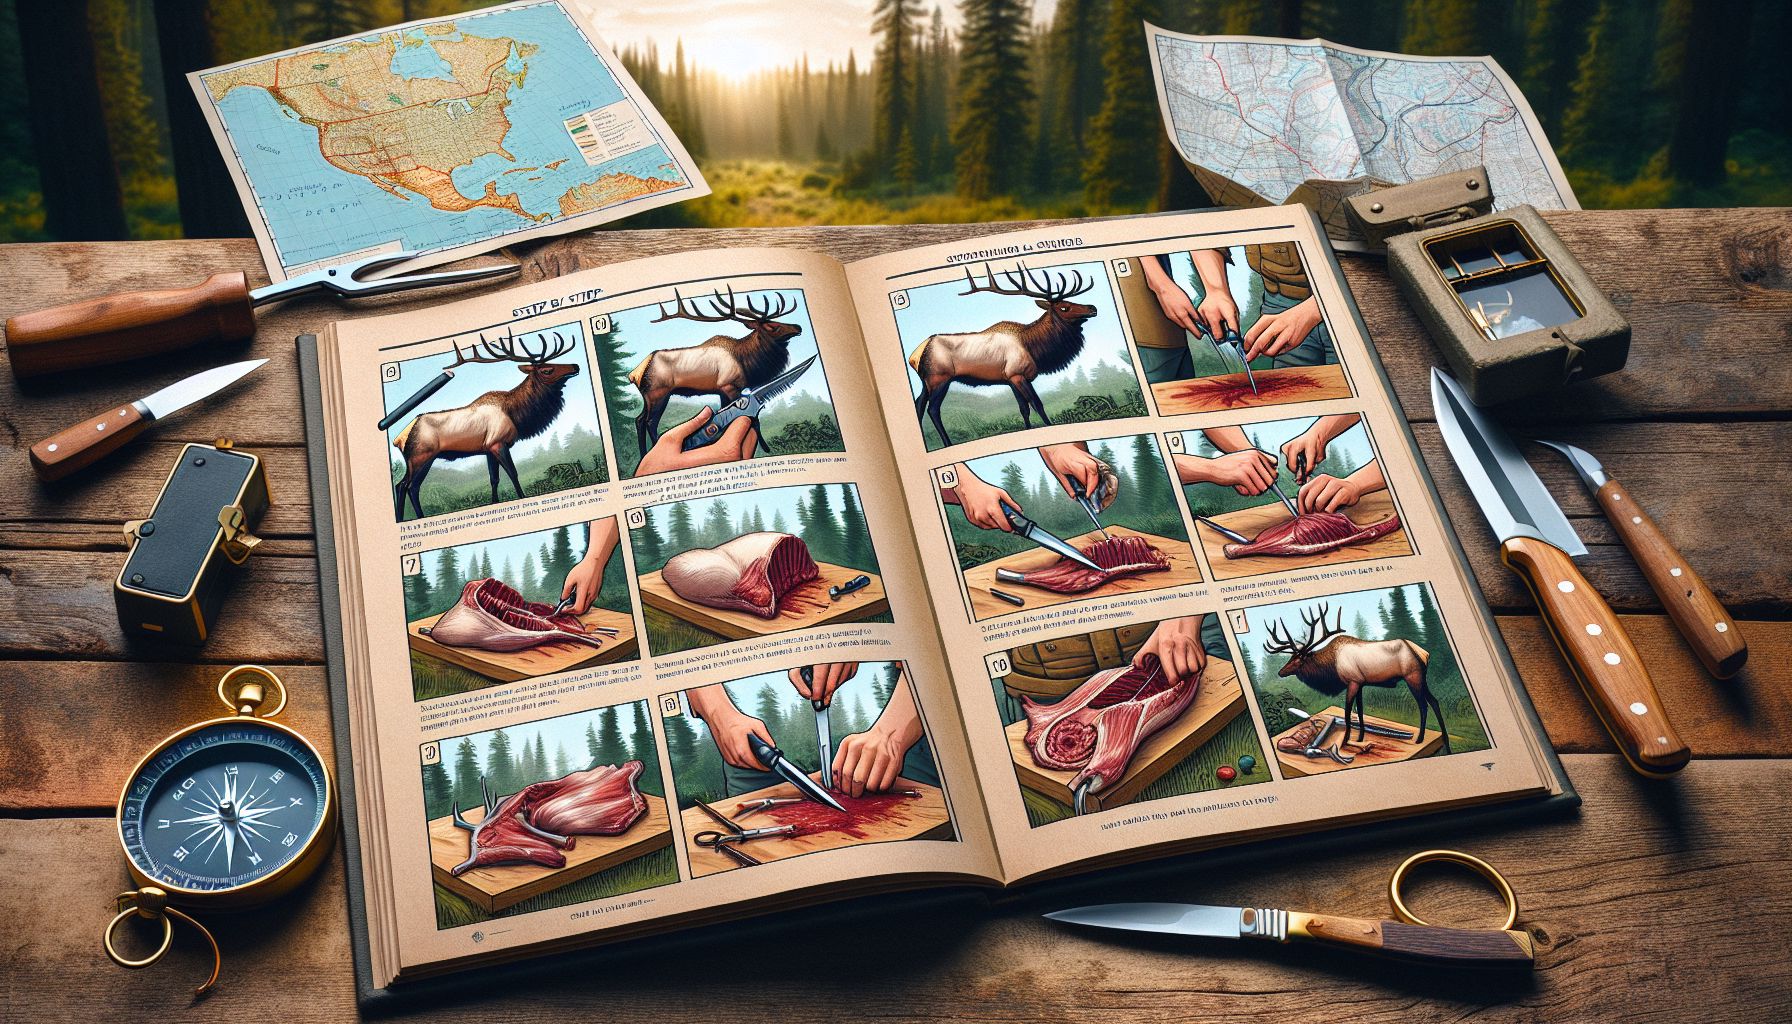
Skinning an elk is an essential skill for any outdoor enthusiast, camper, or family looking to source their own food in a sustainable and organic way. Not only does it allow you to harvest high-quality meat, but it also connects you more deeply with the natural world around you. In this guide, we will walk you through the step-by-step process of skinning an elk so that you can make the most of your hunting adventures.
Preparation
Before you begin the skinning process, it is important to gather the necessary tools. You will need a sharp knife, a bone saw, a skinning gambrel, and a sturdy work surface. Make sure that your tools are clean and in good working condition before starting.
Skinning
-
Hang the Elk: The first step in skinning an elk is to hang the animal from a sturdy tree branch or hook using a skinning gambrel. Make sure the elk is secure before proceeding.
-
Make the Initial Incision: Using your sharp knife, make an incision along the belly of the elk from the throat to the tail. Be careful not to puncture the internal organs as you cut through the skin.
-
Peel Back the Skin: Starting at the incision, carefully peel back the skin using your hands and the knife as needed. Take your time to avoid tearing the hide.
-
Remove the Hides: Once the skin is peeled back, use the bone saw to cut through the joints and remove the legs, head, and hide from the carcass. Be sure to save the hide if you plan on tanning it later.
-
Trim the Meat: With the elk now skinned, you can trim the meat from the carcass for processing. Take care to remove any excess fat, sinew, or connective tissue as you go.
-
Dispose of Waste: Finally, dispose of any remaining waste in a responsible manner, taking care not to leave a mess in the wilderness.
Conclusion
Skinning an elk is a challenging but rewarding task that can provide you with high-quality organic meat for your outdoor adventures. By following this guide, you can learn how to skin an elk in a professional and efficient manner, allowing you to make the most of your hunting experiences. Remember to always respect the animals you harvest and the environment in which you hunt, and enjoy the fruits of your labor in the form of delicious, sustainably sourced elk meat.
Happy hunting!
Surviving in the Wild: How to Catch Fish in the River

As a survivalist, being able to catch your own food is a crucial skill that can mean the difference between thriving and barely surviving in the wilderness. Fish are a great source of protein and nutrients, and rivers are often teeming with them. In this article, we will discuss some techniques for catching fish in the river to help you sustain yourself in the wild.
Introduction:
Imagine finding yourself lost in the wilderness with little food and water supplies. You may have some basic survival gear with you, but it may not be enough to sustain you for long. In such situations, knowing how to catch fish in the river can be a lifesaver. Fish are abundant in rivers and can provide you with a much-needed source of food.
Body:
-
Finding the Right Spot – The first step in catching fish in the river is to find the right spot. Look for areas where the water is moving slowly, such as bends in the river or behind rocks. Fish tend to gather in these calmer waters as it requires less energy for them to swim.
-
Making a Fishing Rod – If you have some basic materials with you, you can fashion a makeshift fishing rod. A long stick or branch can serve as the rod, while you can use a piece of string or even shoelaces as the fishing line. Attach a hook to the end of the line and bait it with insects or small pieces of food.
-
Using a Spear – If you don’t have a fishing rod, you can try your hand at spearfishing. Look for fish swimming near the surface of the water and use a sharpened stick or a homemade spear to catch them. This method requires more skill and precision but can be very effective.
-
Building a Fish Trap – Another method for catching fish in the river is to build a fish trap. You can fashion a trap out of materials such as branches, vines, and rocks to create a barrier for the fish. Leave an opening for the fish to swim in, but make it difficult for them to find their way out.
-
Patience and Observation – Regardless of the method you choose, catching fish in the river requires patience and observation. Take the time to watch the fish and understand their behavior. This will help you determine the best approach to catch them effectively.
Conclusion:
Catching fish in the river can be a rewarding and essential skill for survivalists in the wild. By mastering the techniques mentioned above and honing your fishing skills, you can ensure a sustainable source of food to sustain yourself in the wilderness. Remember to always respect nature and practice responsible fishing practices to ensure the health and longevity of the river ecosystem.
So next time you find yourself lost in the wilderness, don’t panic. Instead, head to the nearest river and try your hand at catching fish. With patience, skill, and a little bit of luck, you may just catch yourself a delicious meal that will keep you going as you navigate the challenges of surviving outdoors.
How to Turn River Water into Safe Drinking Water: An Essential Guide for Adventure Seekers

There’s nothing quite like exploring the great outdoors, immersing yourself in the beauty of nature, and taking on adventures that push your limits. For hiking enthusiasts and outdoor survivalists, venturing into the wilderness offers a sense of freedom and an escape from the daily grind. However, one thing that is often overlooked is the availability of clean drinking water when traversing remote areas, especially near rivers.
Running rivers may seem like a reliable water source, but the reality is that they can be teeming with harmful bacteria, parasites, and other contaminants. Drinking untreated river water puts you at risk of waterborne illnesses such as Giardia, E. coli, or even cholera. Nevertheless, with a basic understanding of water purification techniques, you can transform that seemingly untouchable river water into a safe and refreshing drink.
1. Assess the Water Source
Before you start dreaming about quenching your thirst with the river water, it is crucial to assess the quality of the water source. Ideally, the water should be clear, fast-flowing, and devoid of any odor. If the river water appears murky or smells foul, it’s best to locate an alternative water source to avoid complications.
2. Preparation is Key
Now that you’ve found a suitable water source, it’s time to prepare for the purification process. Begin by gathering the necessary equipment, including a water container, water purification tablets, a water filter, a heat source, and a pot for boiling.
3. Boiling Water – The Old-Fashioned Way
One of the simplest and most effective methods to purify river water is by boiling it. Fill your pot with water from the river and place it over your heat source until it reaches a rolling boil. Let it boil for at least one minute to kill off any harmful bacteria and parasites that may be present. Once cooled, the water is safe to drink.
4. The Versatility of Water Purification Tablets
For adventure-seekers who prefer a lightweight and hassle-free solution, water purification tablets are the way to go. These tablets contain chemicals that eliminate the pathogens found in river water. Simply follow the instructions on the packet, dissolve the appropriate number of tablets in your water container, and wait for the recommended amount of time before drinking.
5. Filtering Out Impurities
While boiling and using purification tablets are effective, they may not remove all impurities from the water. To ensure a more comprehensive purification process, using a water filter is highly recommended. Various portable water filters are available on the market, designed specifically for outdoor enthusiasts. These filters work by physically straining out bacteria and other contaminants, providing you with clean drinking water within seconds.
6. The Power of Ultraviolet Rays
For those seeking a cutting-edge solution, ultraviolet (UV) light purification systems have become increasingly popular. These compact devices emit UV rays that penetrate the water, disabling the DNA of harmful microorganisms and rendering them inactive. UV purification is quick, efficient, and requires minimal effort. However, it is important to consider battery life and the availability of replacement batteries when relying on this method.
Conclusion
When immersing yourself in the world of outdoor exploration, it’s crucial to prioritize your health and safety. Access to clean drinking water is vital, especially when your adventures take you near rivers and other natural water sources. By utilizing simple techniques such as boiling, using water purification tablets, employing water filters, or harnessing UV light, you can convert river water into safe, potable refreshment.
Remember, every adventure should begin with thorough research and planning, including understanding the local environment and the potential risks associated with drinking untreated water. Be prepared, stay hydrated, and make memories that will last a lifetime as you conquer new frontiers with confidence and peace of mind.
Designing Interiors Inspired by Outdoor Landscapes

Having a close connection with Mother Nature is important for your health and mind. That is why interior designers do not focus just on the inside of your house. They consider the outdoor landscape and environment to redesign your livable space. They can bring the surrounding landscape into your home interior. So, how will your interior designers design the home interiors based on the outdoor landscape? There are a few ways to create a nature-inspired home interior design.
Use organic materials for your furnishings
Stone, wood, and some other natural materials evoke an earthy feel. So, the textures you find in your outdoor settings will be present in your home interiors. Some people also invest in bamboo furnishings and stone countertops. The wall art can also be a wooden piece to add aesthetics.
Illuminate your room with natural light
Circadian rhythms control our overall health and sleep patterns. As natural light rays can directly affect these rhythms, amplify the light by placing the windows strategically. You may also invest in light-reflecting materials or install skylights. Uplift your energy and mood with more light rays.
Consider water features-
Flowing water has a calming sound to alleviate stress and give relaxation. It is achievable by installing aquariums or indoor fountains. The auditory and visual elements will make your home interior beautiful.
Grow indoor plants
Another good idea is to grow indoor plants that do not need much sunlight. Choose plants with larger leaves. However, you may also add faux plants to add aesthetic value to your room. It is the best way to simulate the greenery outside the house.
Interior design ideas based on different locations of your house
Interior design for houses in coastal regions – As the coastal regions have a calm and relaxing environment, you can use serene colors, such as light blues and sandy neutrals. The blue paint on the wall reflects how sunrays sparkle on the big ocean. Besides, decorations with seashells, natural fibers, and wild native flowers are some creative ideas.
Interior space design for homes in mountainous regions – A mountainous landscape reminds you of clear skies and lush mountains. So, you can choose the earthy colors and add a rustic touch with stone accents. Moreover, your windows should be large to enjoy the stunning views of the surrounding mountains. It will help you connect the interiors with the outdoors.
Interior design for houses in urban regions – If you live in high-rise apartments in a metropolitan region, you should design your home interiors differently. The combination of manmade stones and natural elements will be the best choice. You may also add some metal elements to the design. Many interior designers recommend merging contemporary-style decors and antique charms while designing a living space. Your indoors will become an oasis with this approach.
Although these tips will help you create an outdoor-inspired interior design, you may face some challenges. Tucson interior design experts will provide you with the best services for your home interior designs.
How to Safely Start a Fire in the Wild: A Guide for Adventure Seekers
Introduction
Exploring the wilderness can be an exhilarating and eye-opening experience for adventure seekers. However, one must always be prepared for any situation that may arise, including the need for warmth or cooking. In such circumstances, knowing how to start a fire in the wild is an essential skill that every outdoor enthusiast should possess. In this educational guide, we will walk you through the necessary steps to safely start a fire, ensuring you can enjoy a memorable adventure while also staying safe.
Body
Step 1: Find a Suitable Location
Before you start a fire, it is crucial to find an appropriate location to set it up. Look for a clear and open spot away from any flammable materials such as fallen leaves, branches, or dry grass. This way, you minimize the risk of the fire spreading uncontrollably.
Step 2: Gather Your Materials
Next, gather the necessary materials needed to start a fire. The three basic components are tinder, kindling, and fuel. Tinder refers to easily ignitable materials like dry grass, leaves, or bark shreds. Kindling includes small sticks and twigs, while fuel consists of larger logs and branches. It is advisable to gather more materials than you initially anticipate needing to ensure a successful fire-starting endeavor.
Step 3: Prepare the Fire Pit
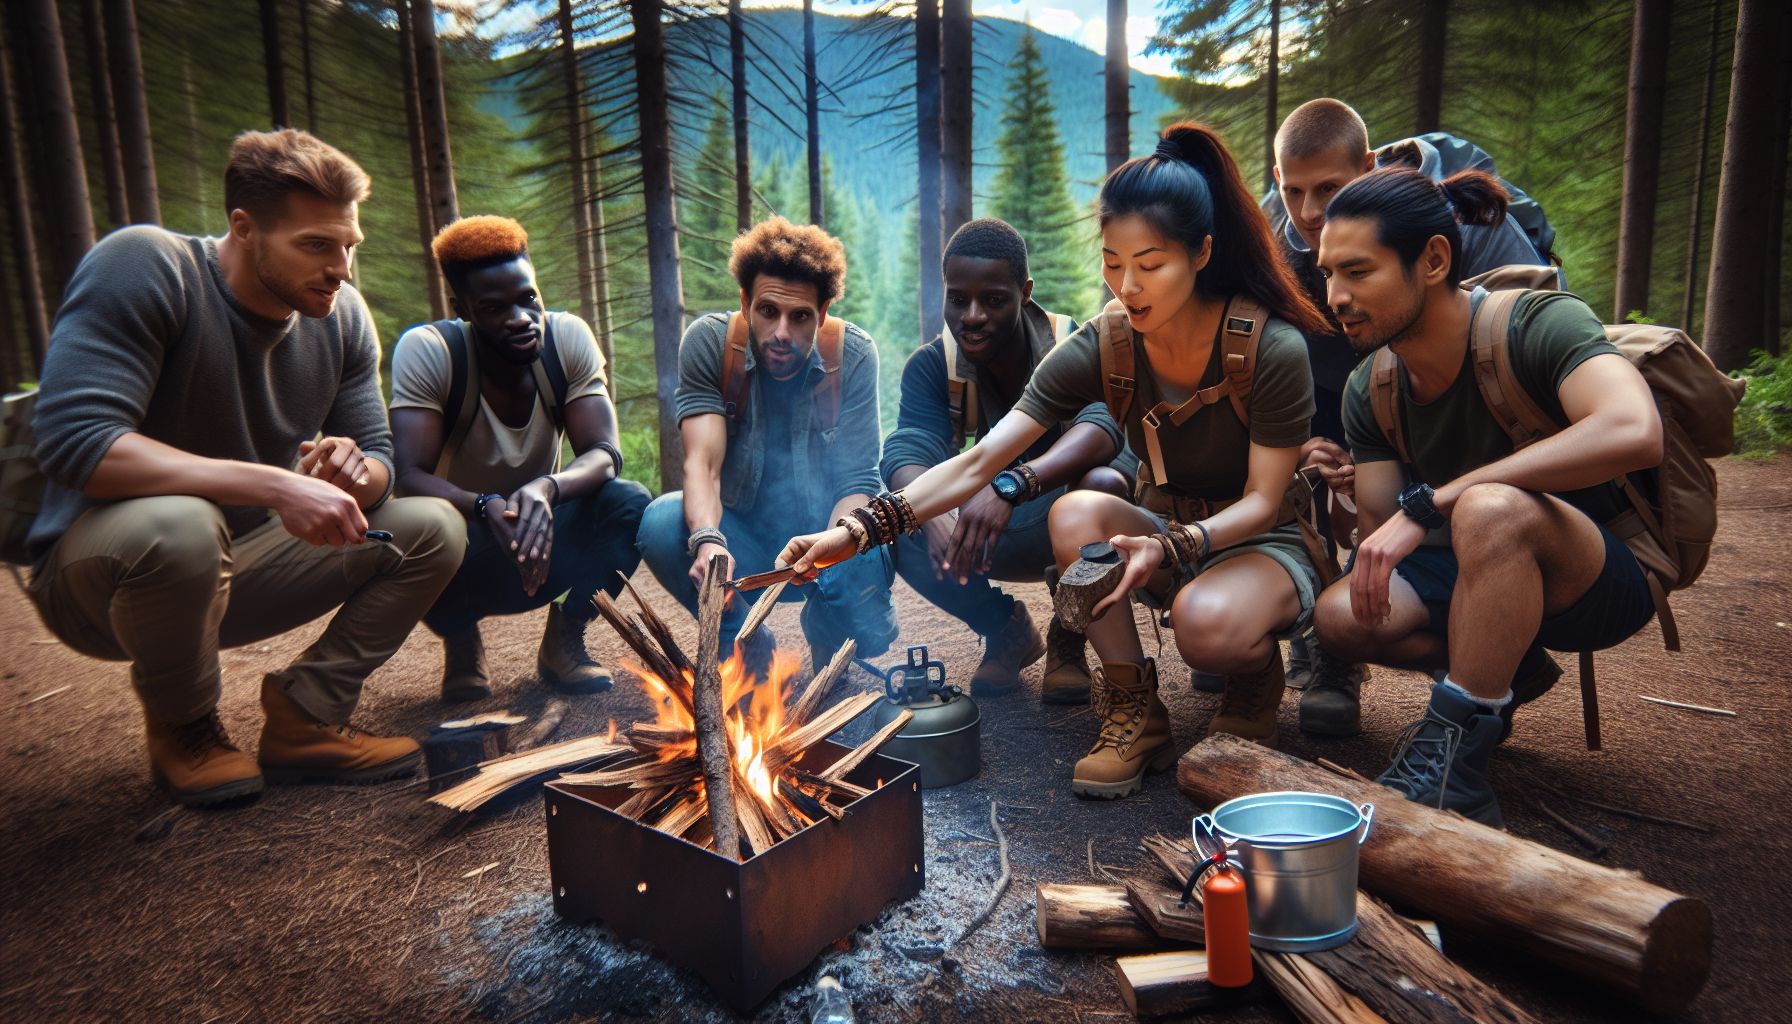
Create a fire pit by clearing a small area, approximately three feet in diameter. Dig a shallow hole and surround it with rocks or stones, acting as a boundary to contain the fire. This keeps the fire controlled and avoids any accidental spread.
Step 4: Arrange the Materials
Begin by placing the tinder in the center of the fire pit. This serves as the initial ignition material. On top of the tinder, carefully arrange the kindling in a cone-like shape, ensuring to leave gaps for air circulation. Finally, lay the fuel on top of the kindling, making sure there is enough space for oxygen to reach the fire once started.
Step 5: Ignite the Fire
To ignite the fire, you can use a variety of methods, such as matches, a lighter, or a fire starter. When using matches or a lighter, light the tinder from multiple angles to ensure a faster and more even burn. If you are using a fire starter, strike it against a rough surface to create sparks and ignite the tinder. Once the tinder catches fire, carefully nurture and blow on it to help the flames spread to the kindling.
Step 6: Maintain and Control the Fire
Once your fire is burning steadily, it is time to maintain and control it. Add small sticks and twigs gradually as the flames grow stronger. Remember to feed the fire slowly, allowing each addition to catch fire before adding more. Keep an eye on the fire at all times, ensuring it remains within the fire pit and doesn’t spread to the surrounding area.
Step 7: Extinguish the Fire Properly
When you no longer require the fire, it is crucial to extinguish it thoroughly. Use water or sand to douse the flames and embers completely. Stir the ashes and embers with a stick to ensure there are no remaining hot spots. Only leave the area once you are absolutely certain that the fire is completely extinguished.
Conclusion
Starting a fire in the wild can be a crucial skill for adventure seekers, providing warmth, comfort, and a means to cook food. By following the steps outlined in this guide, you can safely start a fire while minimizing the risk of accidents or wildfires. Remember to always exercise caution and be responsible when handling fire in the wilderness. Embrace the beauty of nature, but do so with the utmost respect for its potential dangers. Happy exploring!